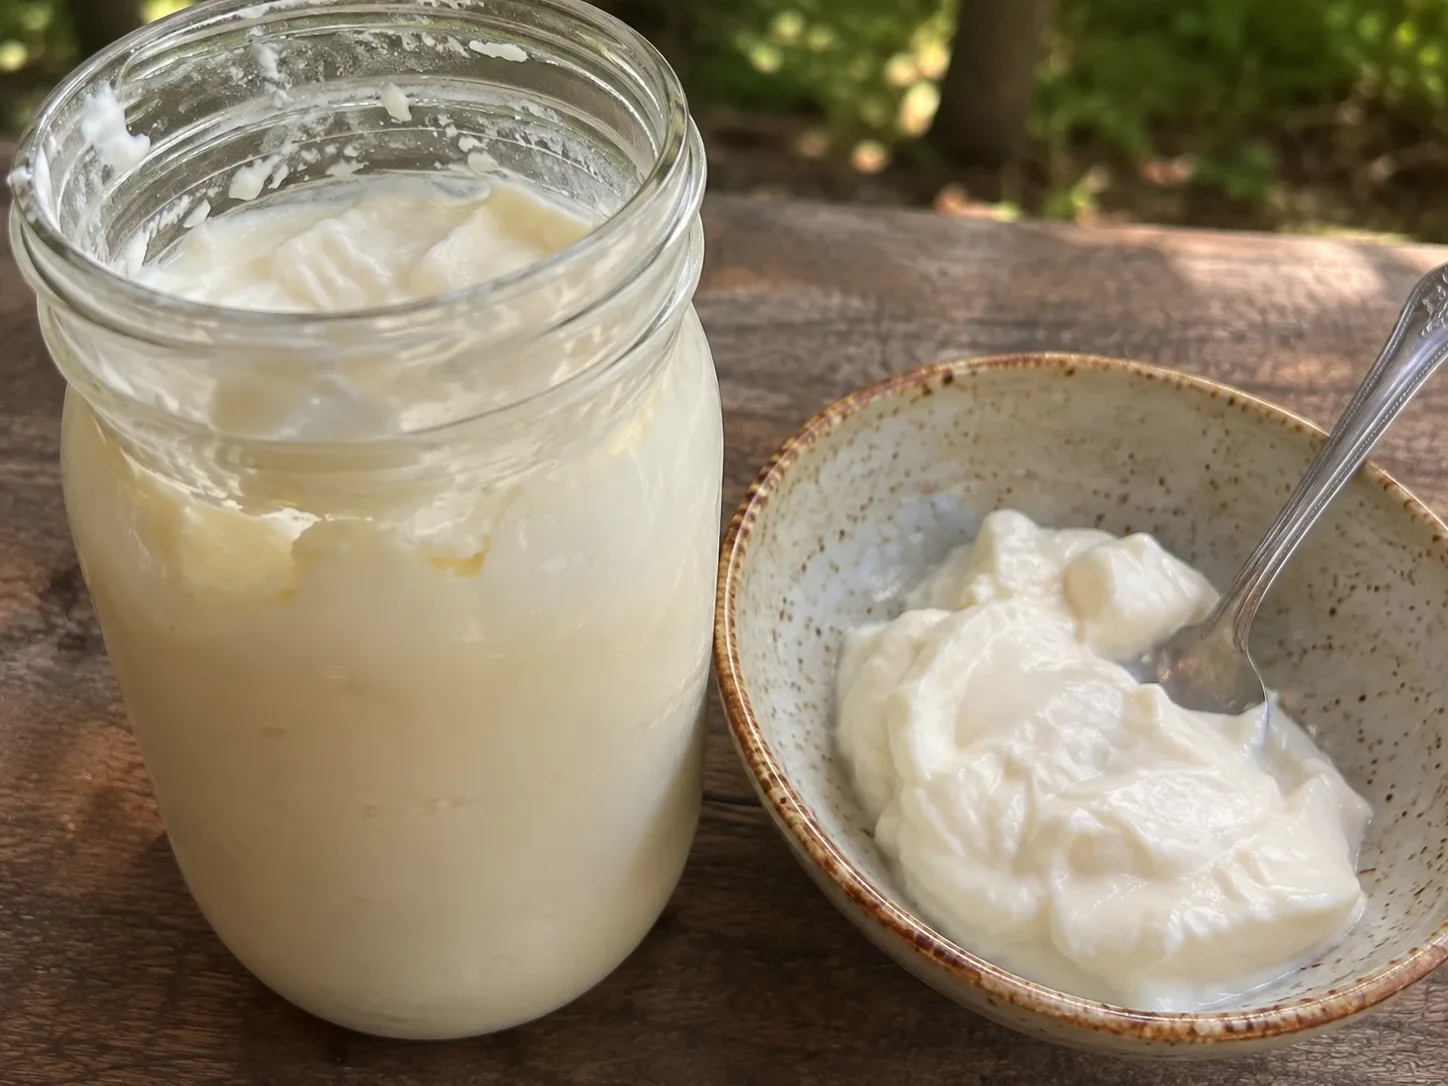
24-Hour Cultured Yogurt
Thick, tangy homemade yogurt from raw or grass-fed milk, cultured low and slow for a full 24 hours. The long ferment gives the cultures time to use up nearly all the milk sugar, so it’s extra tart and very gentle on digestion.
Yield: About 2 quarts · Active: 20 min · Total: About 26 hours, plus chilling · Season: Best in North America in fall and winter, when an oven light or warm corner makes holding a long, steady ferment easy · Best eaten: morning
Ingredients
For the yogurt
- ½ gallon (8 cups) whole milk: raw milk from a farm you trust, or organic, grass-fed, low-temperature pasteurized (non-homogenized if you can find it; avoid ultra-pasteurized)
- ¼ cup plain whole-milk yogurt with live, active cultures, as your starter (or a freeze-dried yogurt starter, following the package amount)
For the two-way method
- Choose the classic thick method (heat to 180°F) for the firmest, most reliable set, or the raw method (warm only to 110°F) to keep the milk raw, with a thinner, more drinkable result.
You’ll also need
- A heavy-bottomed pot and an instant-read or clip-on thermometer
- Two clean quart glass jars with lids
- A way to hold 100–110°F for 24 hours: a yogurt maker with a 24-hour setting, an Instant Pot on its yogurt setting, a dehydrator, or your oven with only the light on (check it with a thermometer first; most hold about 100°F)
Method
- Choose your method. For the classic thick method, go on to step 2. For the raw method, gently warm the raw milk to 110°F, stirring, and skip to step 4. Raw milk’s own bacteria compete with the starter, so this version sets softer and can vary a little from batch to batch.
- Heat the milk (classic method). Pour the milk into the pot and heat it slowly over medium-low heat, stirring often so it doesn’t scorch, to 180°F. Hold it there for 5–10 minutes. This changes the milk proteins so the yogurt sets thick, and it gives the starter a clean field without competing bacteria.
- Cool it down. Take the pot off the heat and cool the milk to 110°F. Set the pot in a sink of cold water and stir to speed it up, about 15 minutes. Don’t add the starter any hotter than 115°F, or you’ll kill the cultures.
- Temper the starter. Whisk the starter yogurt in a small bowl with about 1 cup of the warm milk until completely smooth. Pour it back into the pot and whisk gently to combine. More starter is not better; too much crowds the cultures and can make the yogurt thin.
- Jar it. Pour into the clean jars and close the lids.
- Culture for 24 hours. Set the jars in your yogurt maker, Instant Pot, dehydrator, or oven with the light on, holding 100–110°F. Leave them undisturbed for 24 hours. Don’t stir, shake, or peek too often; the curd sets best when left alone.
- Check. At 24 hours, the yogurt should be set, pulling away cleanly from the side of the jar when tilted, with a little clear whey on top. It will smell clean, fresh, and sharply tangy. A pink, orange, or fuzzy surface, or a foul smell, means it’s spoiled; throw it away and start fresh with clean jars.
- Chill. Refrigerate at least 6 hours. It firms up a great deal as it chills.
- Save your starter. Before you dig in, spoon ¼ cup into a small clean jar to start your next batch. Use it within 7 days for the strongest culture.
Storage
Refrigerate up to 2 weeks. The whey that pools on top is full of protein and minerals; stir it back in, or pour it off for a thicker yogurt and use it in smoothies or to start a vegetable ferment. Reuse your own yogurt as starter for 5–8 batches, then start again with fresh store-bought yogurt or a freeze-dried culture when it starts to set less firmly.
Variations
- Greek-style or labneh: Strain the chilled yogurt through a cheesecloth-lined sieve in the fridge for 2–4 hours for Greek-style, or 12–24 hours for a spreadable labneh. Roll labneh into balls and keep them under olive oil.
- Extra thick: Whisk 1 tbsp grass-fed gelatin into ¼ cup cold milk, let it bloom, then stir it into the hot milk at step 2.
- Goat or sheep milk: Both work with the same method; goat milk yogurt sets softer and is lovely with gelatin.
- Shorter ferment: For a milder yogurt, culture 8–12 hours; it will have more milk sugar left and less tang.
- Kefir instead: For a pourable, room-temperature daily ferment, see my Raw Milk Kefir: A Living Daily Ferment.
- To serve: Spoon into bowls with my Cranberry-Orange Relish or Warm Apples & Cream.
Season & Circadian Timing
Yogurt is made all year, but a 24-hour ferment is easiest to manage in the cooler months, when a warm oven or yogurt maker holds steady without a hot kitchen pushing it too far. Start a batch on Saturday morning and you’ll have a week of breakfasts by Sunday. It’s a morning food for me: a bowl with fruit or compote and a handful of seeds is a protein-rich start to a cold day.
Nourishment Notes
- Long ferment — Over 24 hours, the cultures use up most of the lactose (milk sugar) and turn it into lactic acid, which is what makes the yogurt so tangy and why many people find it easier to digest.
- Live cultures — Yogurt bacteria like Lactobacillus bulgaricus and Streptococcus thermophilus, plus any others in your starter.
- Raw or grass-fed milk — Complete protein, calcium, phosphorus, and B vitamins, plus vitamins A, D, and K2 from the cream, especially from grass-fed cows.
- Whey — A by-product rich in protein, potassium, and calcium. Don’t throw it out.
Sourcing
- Milk — raw milk from a small farm that tests its milk and herd, including for H5N1 bird flu (find a source at realmilk.com), or organic, grass-fed, low-temperature pasteurized whole milk (Kalona SuperNatural)
- Starter — plain, whole-milk, organic yogurt with live cultures and no added thickeners (Straus Family Creamery), or a freeze-dried heirloom yogurt starter (Cultures for Health)
- Grass-fed gelatin — from pasture-raised cattle (Great Lakes or Vital Proteins)
With Love, Light, and Health,
Anna (aka Food Marshall)
Food Marshall Approved. Grain-free, seed-oil-free and refined-sugar-free, made from organic, local and seasonal ingredients. Our standards
More Ferments & Broths
Get new recipes and essays
Seasonal recipes and writing on light, circadian health, and living with nature.
Subscribe on Substack